If you have an Excel file and want to run an analysis in SPSS, it’s more convenient to directly import the data rather than having to retype the entries. You can import data from Excel to SPSS in a few simple steps. I’m using SPSS 27 in this example, but this should work for most older versions of SPSS.
Watch the video, or read on below:

Can’t see the video? Click here to watch it on YouTube.
An important note: Make sure your Excel file is formatted with a variable name in the first row and a column of numbers.
Excel to SPSS: Steps for Importing Data
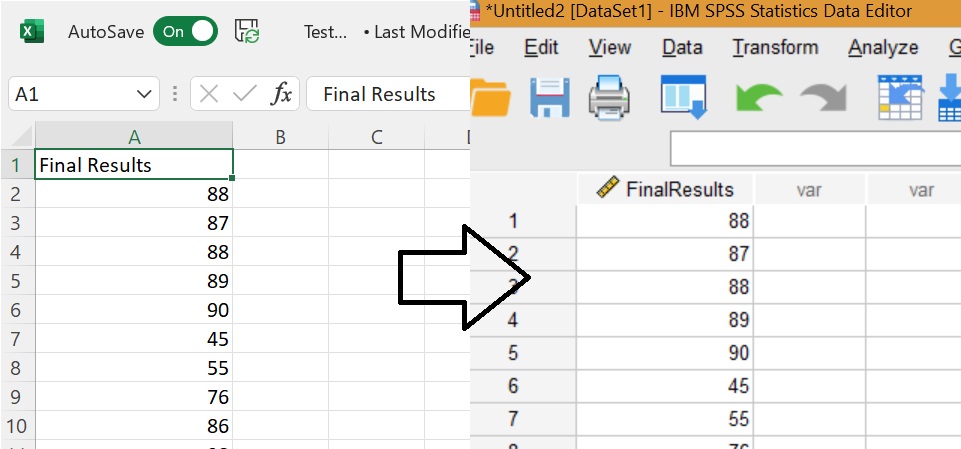
Step 1: Open the Excel file. The first row, that’s Row A, should have your variable name, in this case, that’s “Final Results”. This is a list of exam data from a statistics final that I want to move from Excel to SPSS.
Step 2: Close the Excel workbook, because you can only import closed Excel files into SPSS.
Step 3: Open SPSS.
Step 4: Click File, then click Import Data → Excel.
Step 5: Change the “Files of Type” dropdown box to Excel. Click Open.
Step 6: Leave the “Read Variable names from the first row of data” box checked. This tells SPSS that you want to import the variable names from Row A. In my case, it’s going to import the variable name “Final Results.”
Step 7: In the Worksheet drop down menu, choose the Sheet. My Excel file had a single — sheet 1 — so I’m going to go ahead and leave that. If you had multiple sheets in your Excel file, click the dropdown menu and select the sheet you want to import.
The percentage is the proportion of values in a column that matches a specific data type for SPSS to assign the data to a variable. the default is 95% but this value can be any number above 50. If SPSS cannot determine a data type on this basis it will assign the data to String variable.
Step 8: Click OK
Step 9: Go to Variable View
Step 10: You should see that SPSS has assigned your data the correct variable type. If not, here’s where you can change the measure.